Mac Disk Utility Erase Format For Windows And Mac
Mac Disk Utility Erase Format For Windows And Mac Rating: 8,2/10 2941 reviews
Compatibility is a major concern when people have to shift to macOS. If you think finding the right software is a problem you’re wrong.
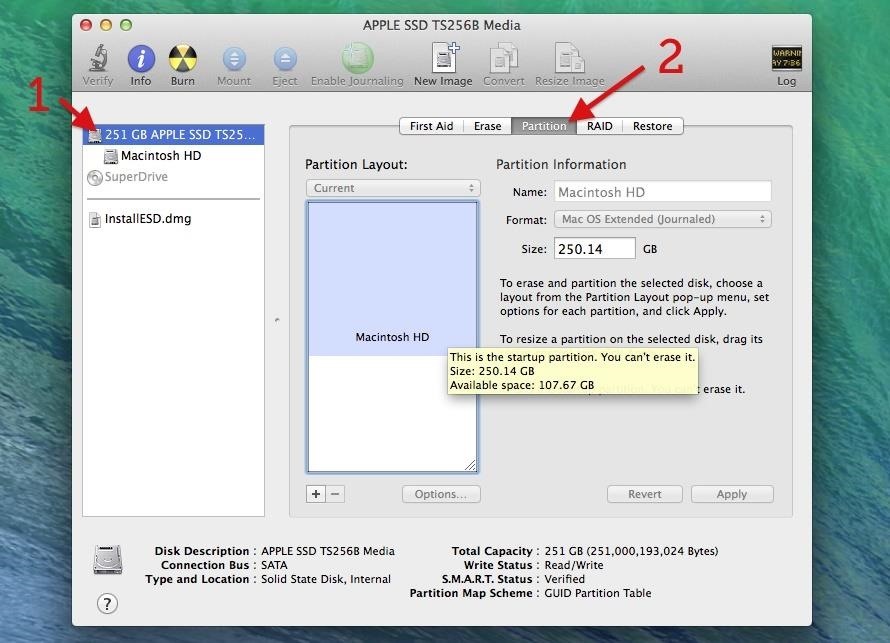
Apr 22, 2012 - Launch Disk Utility, found within /Applications/Utilities/; Connect the drive. Click the “Erase” button to format the drive for Mac & Windows PC.
In a few days or weeks, you can get all the macOS alternative apps you need. The real problem comes when you need to deal with accessories. Let’s not talk about the advanced ones like the printers or scanners, but come to something basic – USB Drives. As you know, USB Drives are quite suitable when you need quick data transfer. Getting the best performance, though, requires you to erase and format a USB Drive on your Mac itself. Let’s put everything in a practical sense now.
You have recently purchased a computer that runs on and you also got a USB Drive. Depending on the purpose of the pen drive, you need to make certain decisions during the formatting process.
Since Luna is based on Ubuntu, there’s a large number of applications to choose from that should fulfill any user’s needs. Pantheon Files For an example of Elementary OS Luna’s approach to applications, let’s take a look at Luna’s file manager, Pantheon Files. This might seem overly minimal, but it keeps to the design ethos: concise, consistent and minimal. Users with more specific needs will have to turn to the Software Center. Best linux software for a apple/mac like environment.
In this article, we have a quite-detailed guide on how to erase and format a USB Drive and keep it accessible on the devices you like. This guide will be suitable for both beginners as well as those who want to try some experiments with File System techniques on your Mac. Essentially speaking, we’ll help you format a USB drive in the right manner. Before we start the tutorial, there are a few things to know! Possible Reasons for Formatting USB Drive using Mac Some of the common reasons why you may need to format a new/old USB Drive via macOS are as follows. Try to confirm the reason before we move ahead, because there may be some minute differences in the whole process.
• You need to delete all the files, and there are too many files to be individually deleted. • The drive is currently based on an incompatible file system.
You need to change it. • You’re confused whether the USB Drive has a malware inside. So, you need to clean it up. If you can relate to the above-mentioned reasons, you can go ahead and format the USB Drive. For the first and third scenarios, you can simply go with traditional USB Formatting.
You will need more insight if you’re formatting the drive for the sake of advanced compatibility. How to Format USB in Mac – Let’s Go Step by Step Note: For this article, we’re using a recently-bought SanDisk USB Drive of 16GB Capacity.
/DiskUtilityErase-589e26215f9b58819ce456e3.jpg "Disk utility mac download")
It hasn’t been used before and I’d like to create a Mac-friendly USB Drive. So, the tutorial will be from that perspective. Shall we start? Step #1 Connect the USB Drive to your Mac device, using the fastest port possible.
Wait for a few seconds while your drive will be detected by the computer. Step #2 We’re using an inbuilt Mac tool named Disk Utility to format USB Drives. In case if you don’t know, it’s quite a powerful tool for managing your disks, partitions and more. It’s one thing I liked about Mac when I shifted into Mac. From the menu, choose the button named Erase. Step #5 In a second, you can see a prompt window, asking for some details.
Step 5.1 First of all, you can rename the USB Drive if you want. Otherwise, the previous name would be retained.
- среда 26 декабря
- 41